기술 자료
만든 날짜
수정 날짜
수정 날짜
How To schedule a transfer
How To Schedule a Transfer
- Stop the transfer queue
- Do the file transfer operation
- A new transfer gets added to the transfer queue
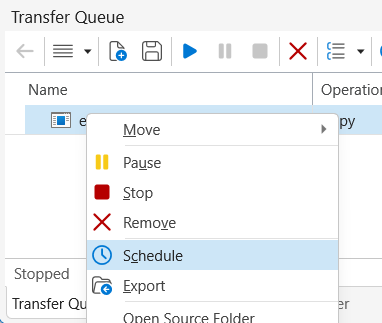
- In the transfer queue, right-click the transfer which you want to schedule
- To make any changes (e.g. a different destination folder) select Properties from the context menu
- Otherwise, select Schedule from the context menu

- The task Properties property sheet opens
- In the General dialog, for the Security options:
By default the scheduled task runs in the interactive session:
(o) Run only when user is logged on
In this case, the task will be added to the Transfer Queue of the application instance.
To run the task whether the user is logged on or not, select:
(o) Run whether user is logged on or not
In this case, the task will be added to the Background Transfer Queue of the service instance.
For more information see KB: How to run scheduled tasks - Go to the Triggers dialog and add the conditions which will trigger the task.
- Click OK
- A new task is created
- Go to the Scheduler pane
- Right-click the newly created task
- Select Run from the context menu
- If you have set up the task in 8 to run in the interactive session:
A new transfer task is added to the Transfer Queue of the application instance.- Go to the Transfer Queue pane
- Start the transfer queue
- If you have selected the (o) Run whether user is logged on or not option in 8, the transfer task is added to the Background Transfer Queue and will get processed immediately.
KB: How to enable Background Transfer Queue pane
Tutorial
For a step by step tutorial, see the Schedule the transfer of a folder tutorial.
키워드
schedule
관련 기사 Synchronization
How To selectively transfer files
How To run scheduled tasks
How To move items to another folder after transfer
What do you think about this topic? Send feedback!